Appearance
ACROWRX - PaintShop
📢 - INFO
PaintShop is ACROWRX’s 3D livery editor. Paint directly on the airplane model, add decals and text, save your design to your account, and use it in Analysis when you visualize flights.
Getting to PaintShop
Open PaintShop from the TopNav menu at the top of the screen — click PaintShop (palette icon). You can also go directly to:
https://app.acrowrx.com/paintshop
PaintShop works in the browser and does not require a subscription. You can paint, preview, and experiment freely. Saving liveries to your account requires that you are signed in.
⚠️ - SCREEN SIZE
PaintShop needs a window at least 940 pixels wide. On phones or narrow windows you will see a message asking you to use a larger screen.
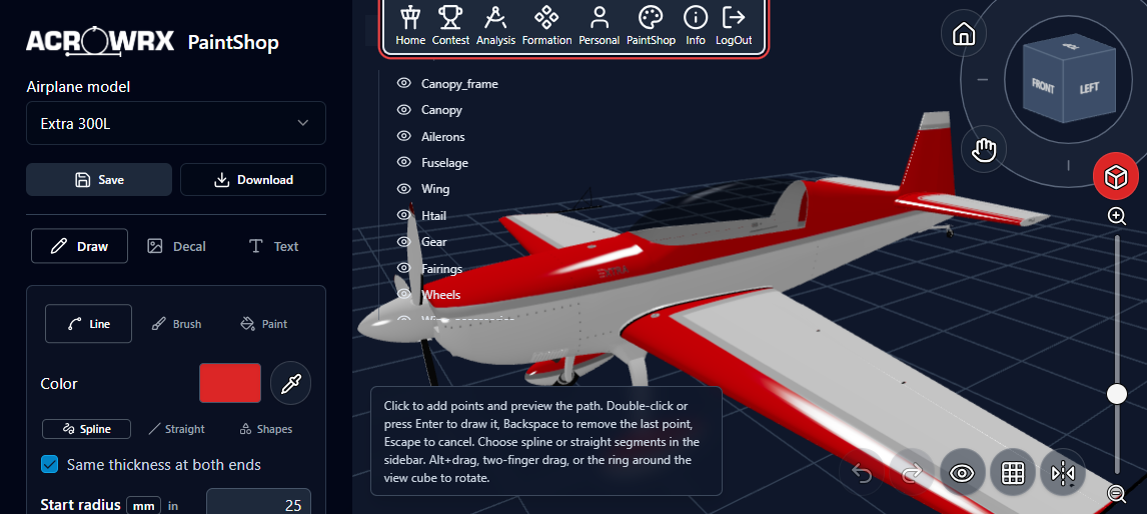
The window has three main areas:
| Area | What it does |
|---|---|
| Left sidebar | Choose the airplane, pick tools, set colors and sizes, save or share |
| 3D canvas | View and paint the model; parts list and help text appear here as overlays |
| Right controls | Rotate the view, zoom, undo/redo, grid, and symmetry |
Context-sensitive help appears in a strip at the bottom-left of the canvas whenever a tool is active.
Choosing an airplane
At the top of the sidebar, use the Airplane model dropdown.
- Saved liveries appear first (designs you or someone else saved to an account). Shared liveries may show a “Shared with you” label.
- Below a separator line you will find the standard catalog — built-in ACROWRX aircraft such as Extra 300L, Edge 540, GameBird GB1, and others.
Changing the model reloads the canvas. Any unsaved paint on the current design will be lost, so Save first if you want to keep your work.
📌 - TIP
When you upload or analyze a flight, you can pick a saved livery in the Analysis model selector the same way. The airplane in the 3D replay will use your custom paint.
Modes: Draw, Decal, and Text
Three modes are available at the top of the tool section in the sidebar:
| Mode | Button | Best for |
|---|---|---|
| Draw | Pencil icon | Freehand brush strokes, lines, shapes, and fill |
| Decal | Image icon | Logos and graphics from PNG/JPG files |
| Text | T icon | Registration numbers, team names, lettering |
Decal and Text switch the view to orthographic projection automatically so graphics project cleanly onto the surface. The perspective toggle is disabled in those modes.
Draw mode
Draw is the default mode when PaintShop opens. Inside Draw you choose one of three sub-tools:
Line tool
The Line tool draws strokes along a path you define on the model. Three path types are available:
| Path type | How to use |
|---|---|
| Spline | Click to place points along a smooth curve. Enter or double-click to finish. Backspace removes the last point. Escape cancels. |
| Straight | Same click workflow, but segments are straight lines. Choose Rounded or Mitered corner joins in the sidebar. |
| Shapes | Click the center, then click again on the edge to set size. The shape is drawn immediately on the second click. |
Shapes includes circle, square, rectangle, polygon (3–12 sides), diamond, and star. Use the Fill shape checkbox to paint a solid fill instead of an outline only.
For spline and straight lines you can uncheck Same thickness at both ends to taper the stroke from a start radius to an end radius.
Brush tool
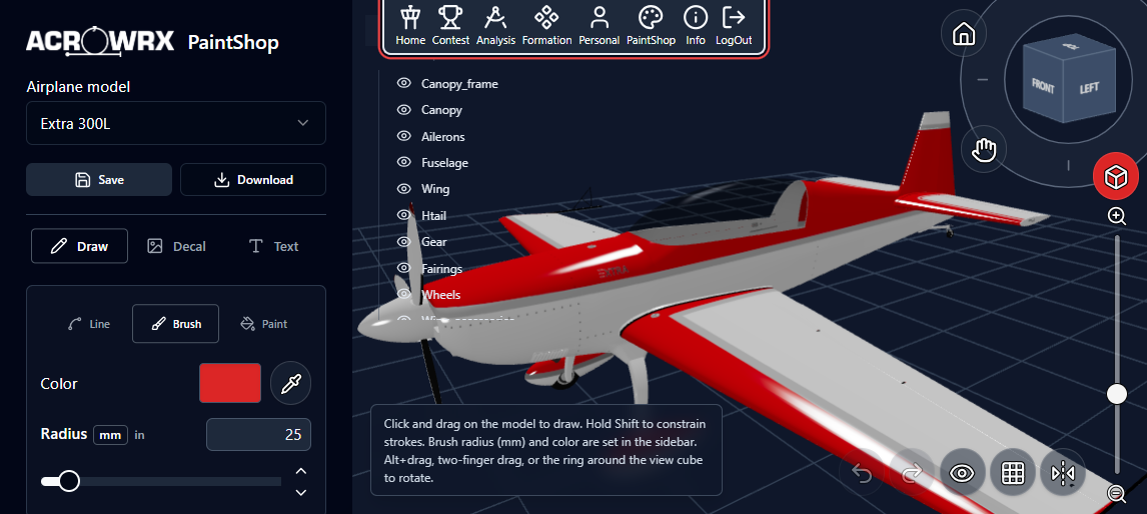
Select Brush, pick a color and Radius (in mm or inches), then click and drag on the model.
- Hold Shift while dragging to constrain the stroke to horizontal or vertical.
- Adjust radius with the slider or type a value in the number box.
Paint (fill) tool
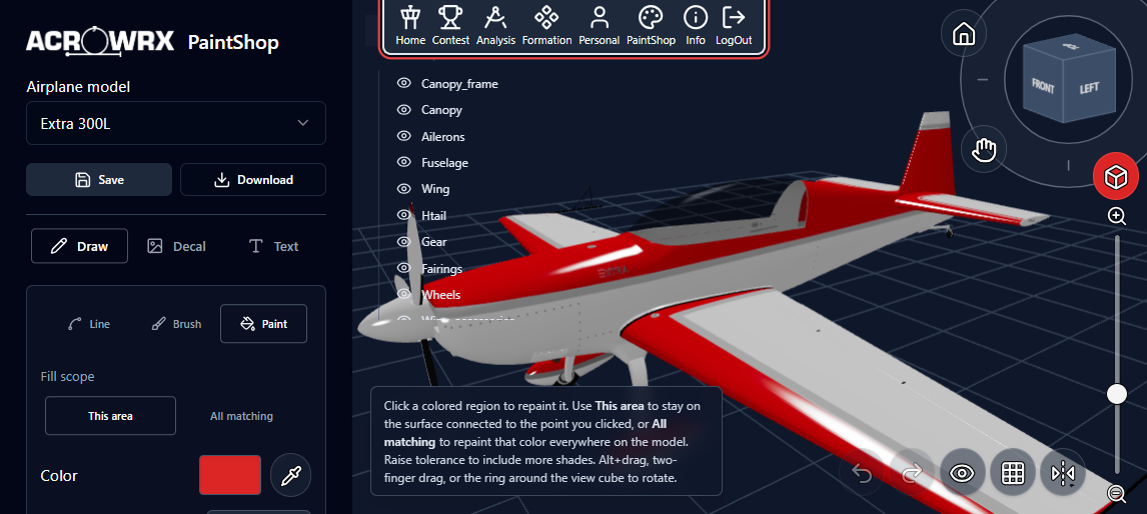
The Paint tool (paint-bucket icon) recolors an area with one click.
| Setting | Meaning |
|---|---|
| This area | Only the connected surface you clicked — good for one panel or wing section |
| All matching | Every part of the model that matches the clicked color |
| Tolerance | How closely colors must match (1–128). Raise it to include nearby shades. |
Shapes tool (detail)
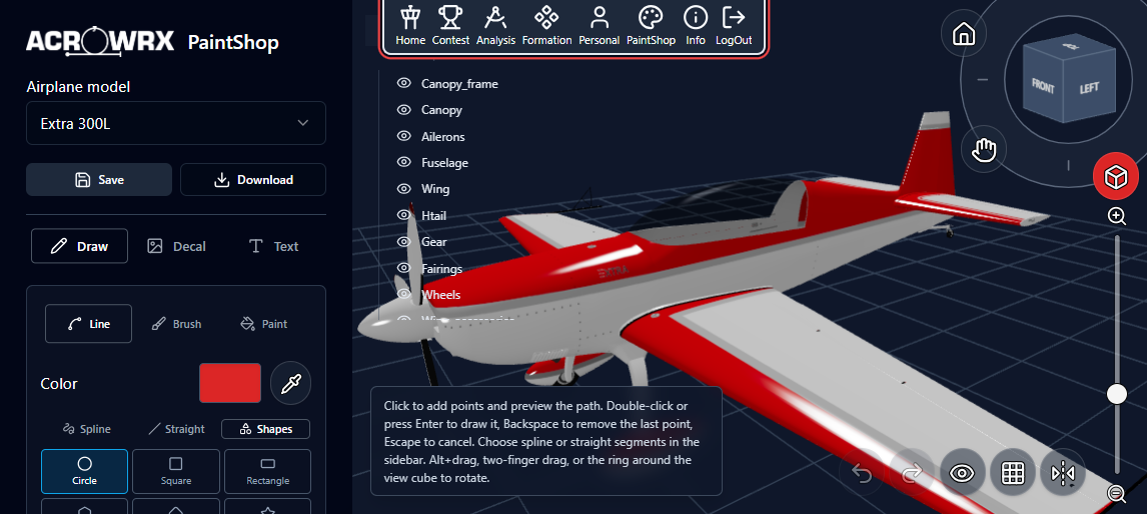
When Shapes is selected, pick a shape from the grid in the sidebar:
- Circle — radius set by distance from center to second click
- Square — equal width and height
- Rectangle — drag defines width and height independently
- Polygon — use the Sides slider (3–12) before drawing
- Diamond — drag defines horizontal and vertical axes independently
- Star — classic star outline; use Fill shape for a solid star
Set Stroke width in mm or inches. Shapes use sharp (mitered) corners.
Color
Every Draw, Decal, and Text operation uses the color controls in the sidebar.
Color selector
Click the color swatch to open the full color picker:
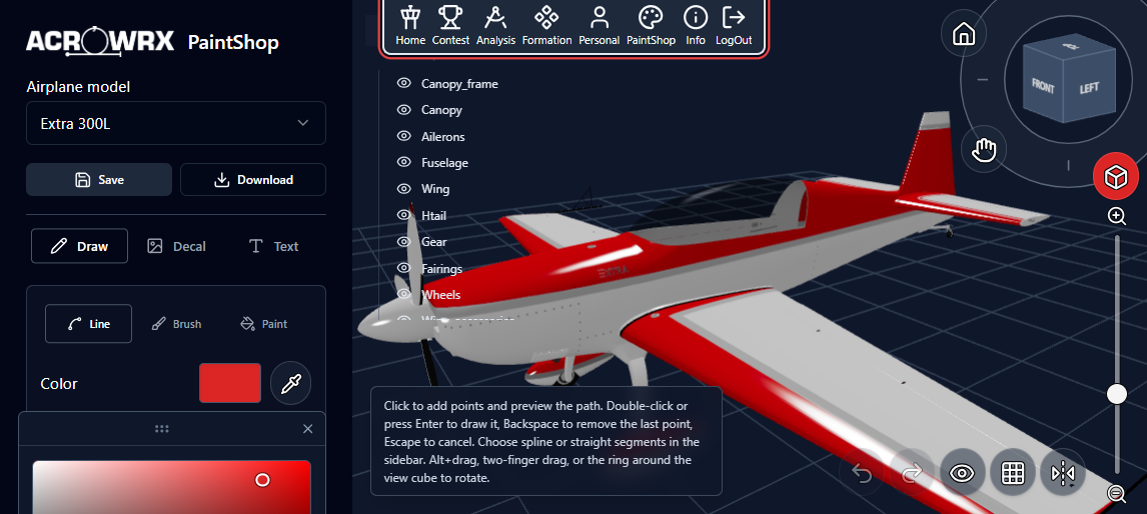
- Drag inside the spectrum to choose a hue and saturation
- Use the vertical slider for brightness
- Enter values as Hex, RGB, CMYK, or Pantone
- Recently used colors appear as swatches below the picker
Pipette (sample from model)
Click the pipette button next to the swatch, then click anywhere on the airplane texture to copy that color. Press Escape to cancel without picking.
Recent colors (canvas)
While in Draw mode, up to 8 recent colors appear in a vertical strip on the right edge of the canvas, below the zoom slider. Click a swatch to select it. Hover a swatch and click × to remove it from the list.
Symmetry
Symmetry mirrors everything you draw across a line — useful for matching left and right sides of the fuselage or wings.
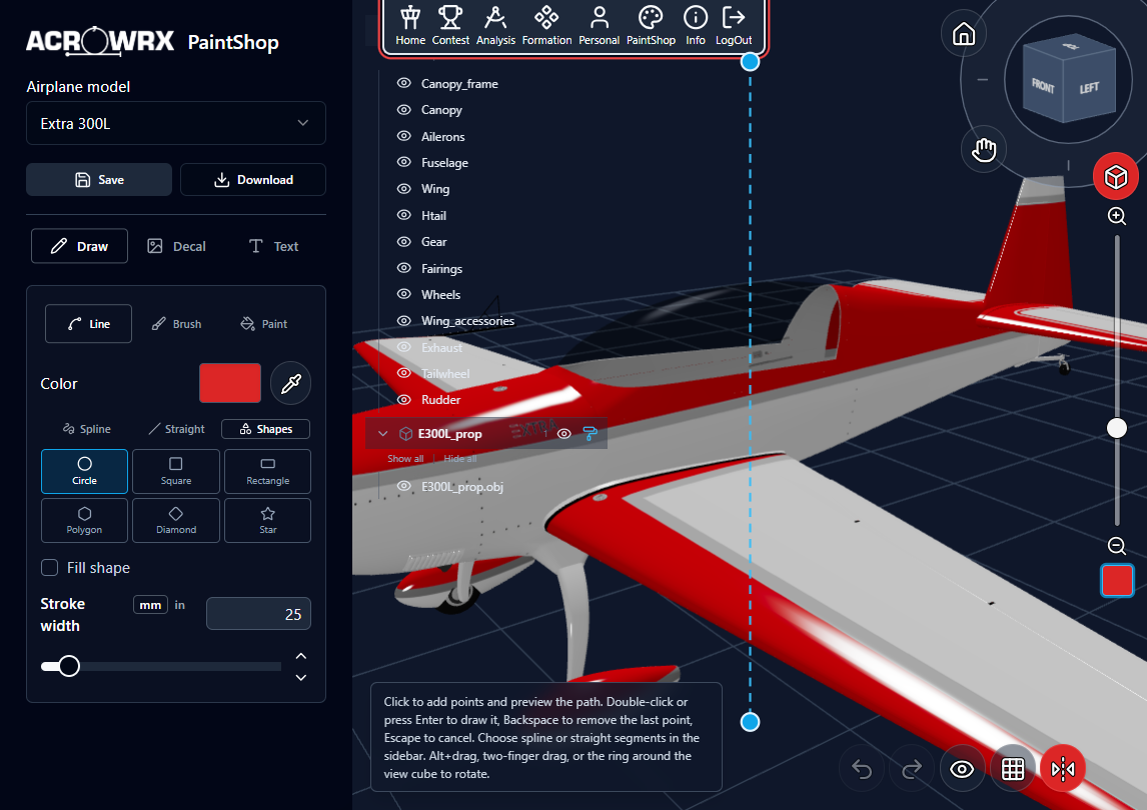
- Stay in Draw mode
- Click the symmetry button (two mirrored triangles) in the bottom-right toolbar
- A cyan line appears on the canvas with handles at each end
- Drag the handles or the line itself to position the mirror axis
- Paint normally — strokes appear on both sides
- Click the symmetry button again to turn mirroring off
Symmetry is available only in Draw mode. It turns off automatically when you switch to Decal or Text.
Decal mode
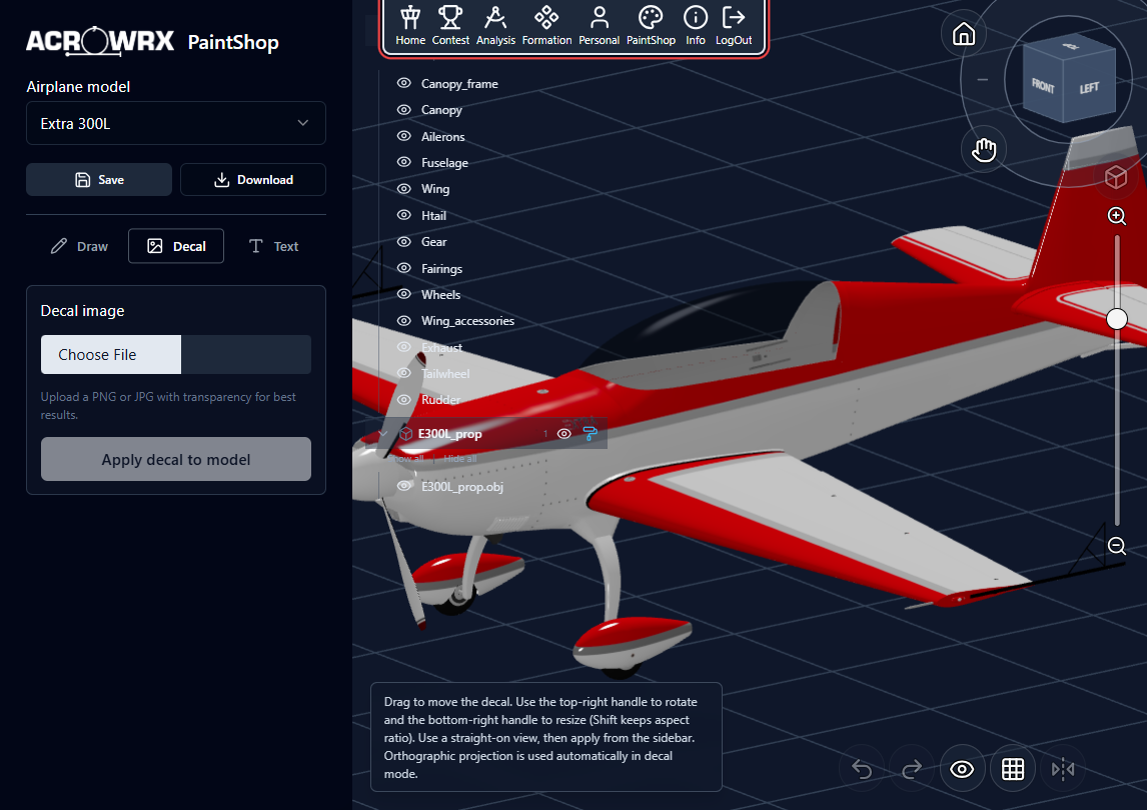
- Click Decal in the sidebar
- Under Decal image, click Choose File and select PNG, JPEG, WebP, or GIF
- A placement box appears on the canvas — drag to move it
- Use the top-right handle to rotate
- Use the bottom-right handle to resize (Shift keeps aspect ratio)
- Face the surface as straight-on as possible (use the view cube)
- Click Apply decal to model in the sidebar
PNG files with transparency work best for logos. The decal is painted into the model texture permanently once applied (you can still Undo immediately afterward).
Text mode
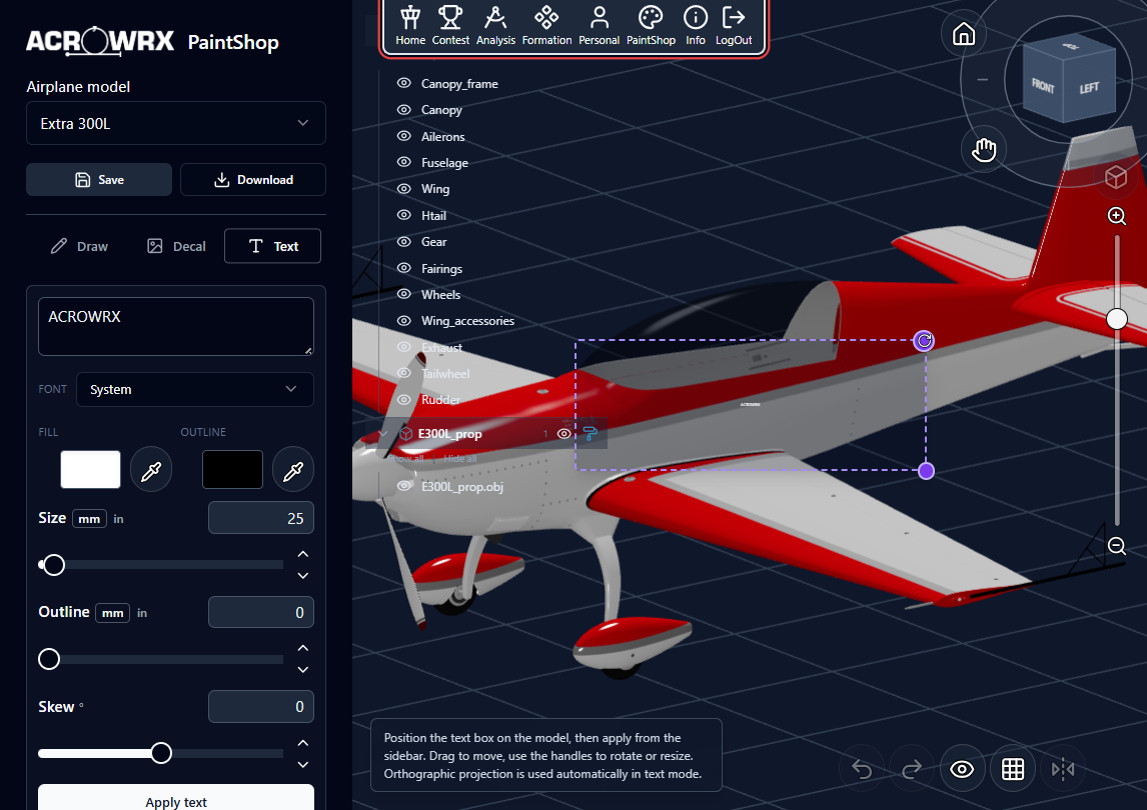
- Click Text in the sidebar
- Type your text (default is
ACROWRX) - Choose a Font: System, Impact, Arial, Georgia, or Monospace
- Set Fill and Outline colors (each has its own pipette)
- Adjust Size, Outline width, and Skew (−45° to 45°) — units can be mm or inches
- Position the text box on the model (drag, rotate, resize — same as decals)
- Click Apply text
Parts panel
The parts panel floats at the top-left of the canvas. It lists every mesh group in the model (fuselage, wing, canopy, propeller, and so on).
| Control | Action |
|---|---|
| Eye icon | Show or hide a part |
| Paint roller icon | Fill that part with the current Draw color |
| Show all / Hide all | Toggle every part in a file group |
| Fill visible parts | Fill all visible parts in the group at once |
Hiding parts makes it easier to reach surfaces underneath — for example, hide the wing to paint the top of the fuselage.
Camera and navigation
View cube (top-right)
Click a face (Front, Back, Left, Right, Top, Bottom) to snap to that orthographic view. Drag the ring around the cube to orbit freely.
Toolbar buttons (right edge)
| Button | Action |
|---|---|
| Home | Recenter the model; keeps your current viewing angle |
| Hand | Toggle pan mode — left-drag moves the view (helpful on trackpads) |
| Box | Toggle perspective ↔ orthographic (disabled in Decal/Text) |
| Zoom slider | Drag up to zoom in, down to zoom out |
Mouse and trackpad
| Input | Action |
|---|---|
| Alt + drag (or two-finger drag) | Rotate the view |
| Middle mouse drag | Rotate |
| Right mouse drag | Pan |
| Scroll wheel | Zoom in/out |
Left-click is reserved for painting and placing graphics, not for orbiting (unless pan mode is on).
Bottom toolbar
The row of buttons at the bottom-right of the canvas:
| Button | Action |
|---|---|
| Undo | Undo the last paint action (Ctrl+Z / Cmd+Z) |
| Redo | Redo (Ctrl+Y, Cmd+Y, or Ctrl+Shift+Z) |
| Eye / dashed eye | Visible side only vs both sides — use “both sides” for thin surfaces like tail surfaces |
| Grid | Toggle the screen alignment grid (orthographic axis views only) |
| Sliders (appears when grid is on) | Open grid appearance settings |
| Symmetry | Mirror strokes across the cyan axis (Draw mode only) |
Screen alignment grid
The screen grid helps you align stripes, numbers, and graphics when viewing the model straight-on.
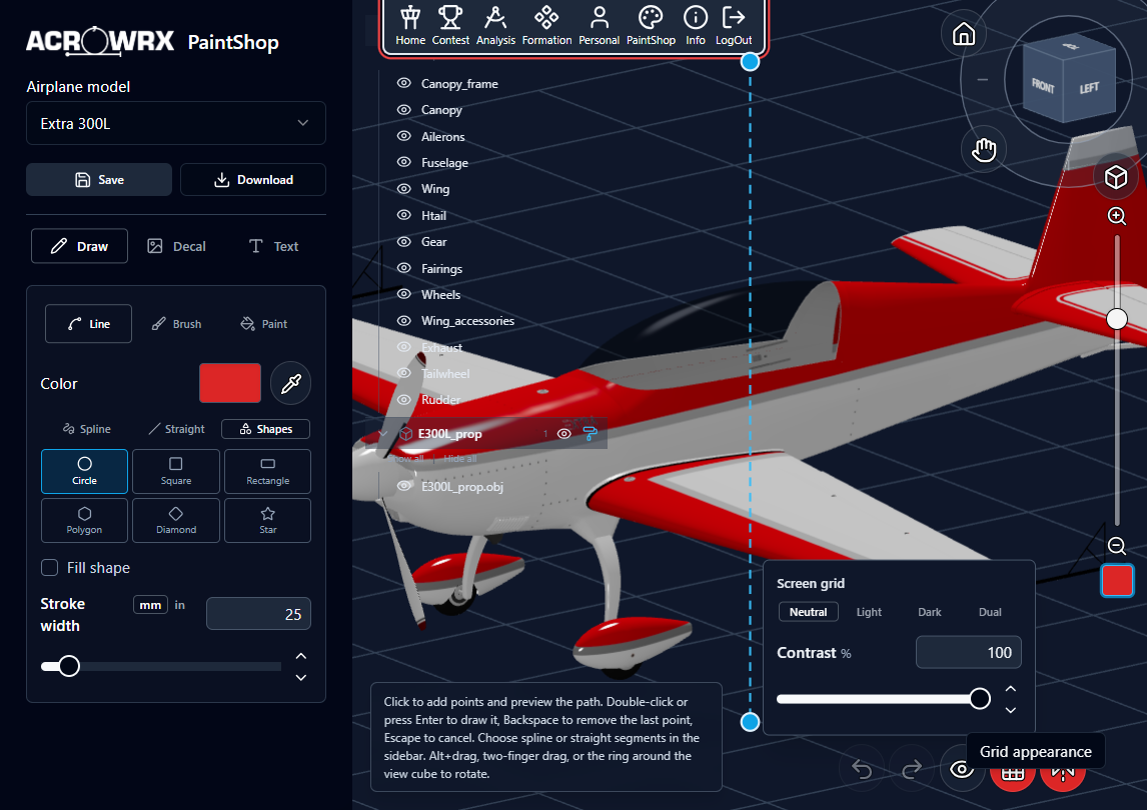
- Switch to orthographic view (box button) and snap to an axis face with the view cube
- Turn on the grid button in the bottom toolbar
- Click the small sliders button that appears on the grid button
- Choose a preset:
| Preset | When to use |
|---|---|
| Neutral | General purpose |
| Light | Dark paint — pale grid lines |
| Dark | Light paint — dark grid lines |
| Dual | Mixed light and dark surfaces — two-tone grid |
Adjust Contrast (25–100%) so the grid is visible but not distracting. Your choice is remembered between sessions.
Saving, sharing, and deleting
Save
- Sign in to your ACROWRX account
- Click Save in the sidebar
- Enter a name (defaults to the airplane name plus today’s date)
- Click Save in the dialog
PaintShop saves texture files only — not a duplicate of the 3D model. Your livery is stored in your account and appears in the model dropdown under saved liveries.
If you open someone else’s shared livery and click Save, PaintShop creates a new copy under your account rather than overwriting the original.
Share
When viewing a livery you own, click Share to search for other ACROWRX pilots and grant them access. They will see the livery in their dropdown labeled as shared with them. Use Unshare to revoke access.
Delete
Click Delete to permanently remove a saved livery you own. You return to the standard catalog model afterward.
📌 - TIP
You do not need to save to experiment. Paint freely, use Undo, and only save when you are happy with the result.
Using your livery in Analysis
After saving:
- Open Analysis and load a flight (or start a new session)
- In the model selector, choose your saved livery from the list
- The chase and judge views render your custom paint on the airplane
Saved liveries persist even if a model is later removed from the PaintShop catalog — you can still open and edit textures you saved earlier.
Keyboard shortcuts
| Shortcut | Action |
|---|---|
| Ctrl+Z / Cmd+Z | Undo |
| Ctrl+Y / Cmd+Y / Ctrl+Shift+Z | Redo |
| Escape | Cancel color pick, cancel in-progress line, or close grid settings |
| Enter | Finish a spline or straight line |
| Backspace | Remove last line anchor point |
| Shift (hold) | Constrain brush to horizontal or vertical; lock aspect ratio when resizing decals |
| Double-click | Finish a line path |
Available aircraft
The airplanes listed in the PaintShop dropdown are the models enabled in the ACROWRX catalog. The list includes popular aerobatic types such as Extra 300L, Edge 540, GameBird GB1, Pitts S2B, Yak 52/55, Su-26, and others. If you do not see a particular type, it may not be enabled yet — check back after app updates.
Quick workflow example
- Open PaintShop from the TopNav
- Select your airplane from the dropdown
- Pick Draw → Brush, choose a color, and paint a base coat
- Enable Symmetry and add matching stripes on both sides
- Switch to Text, add a registration number, and Apply text
- Use the view cube to check all sides
- Save with a descriptive name
- Open Analysis, select your saved livery, and fly!
📌 - TIP
Use orthographic views and the screen grid when placing straight stripes or numbers. Switch back to perspective to judge how the design looks in three dimensions.