Appearance
ACROWRX - Judge View
📢 - INFO
This page provides detailed information about how to use the Judge view in ACROWRX.
Judge View
Probably the most important feature of ACROWRX is the Judge View. The Judge View allows you to visualize your flight from the Judge perspective, without the need for a person sitting on the ground, critiquing or filming you. There are some useful features to learn about the Judge View.
Judge Head Control
The Judge head position is, by default, always pointing at the aircraft - like a perfect camera that tracks the airplane all the time. To control the zoom, you can use the scroll wheel on your mouse or a pinch gesture on Mac computers.
Using the keyboard key H, you can set the Judge head position manually, using your mouse to click and drag. This is especially useful to have an overall view of a maneuver, such as how round a loop is.
Airplane Trajectory
In the Judge View, the airplane displays a trajectory line lasting 1 second. Think of this trajectory line as a smoke trace. You can toggle this trajectory line using the keyboard key T.
You can also make the trajectory line persistent from a given time using the keyboard key R. While persistent, the trajectory line will increase in length until you toggle the persistence again using the same keyboard key. This persistent trajectory line is useful for checking the consistency of arcs and the position of roll elements in lines. In conjunction with the manual judge head position, the persistent trajectory line is a great tool for visualizing how round your loops are.
📌 - TIP
This video shows how the combination of Persistent Trajectory and Manual Judge Head Movement can help visualize a loop. Notice on the keyboard shortcuts map that for the left video, the option H is marked - automatic Judge head movement - and R is unchecked - normal trajectory.
Reference Axis
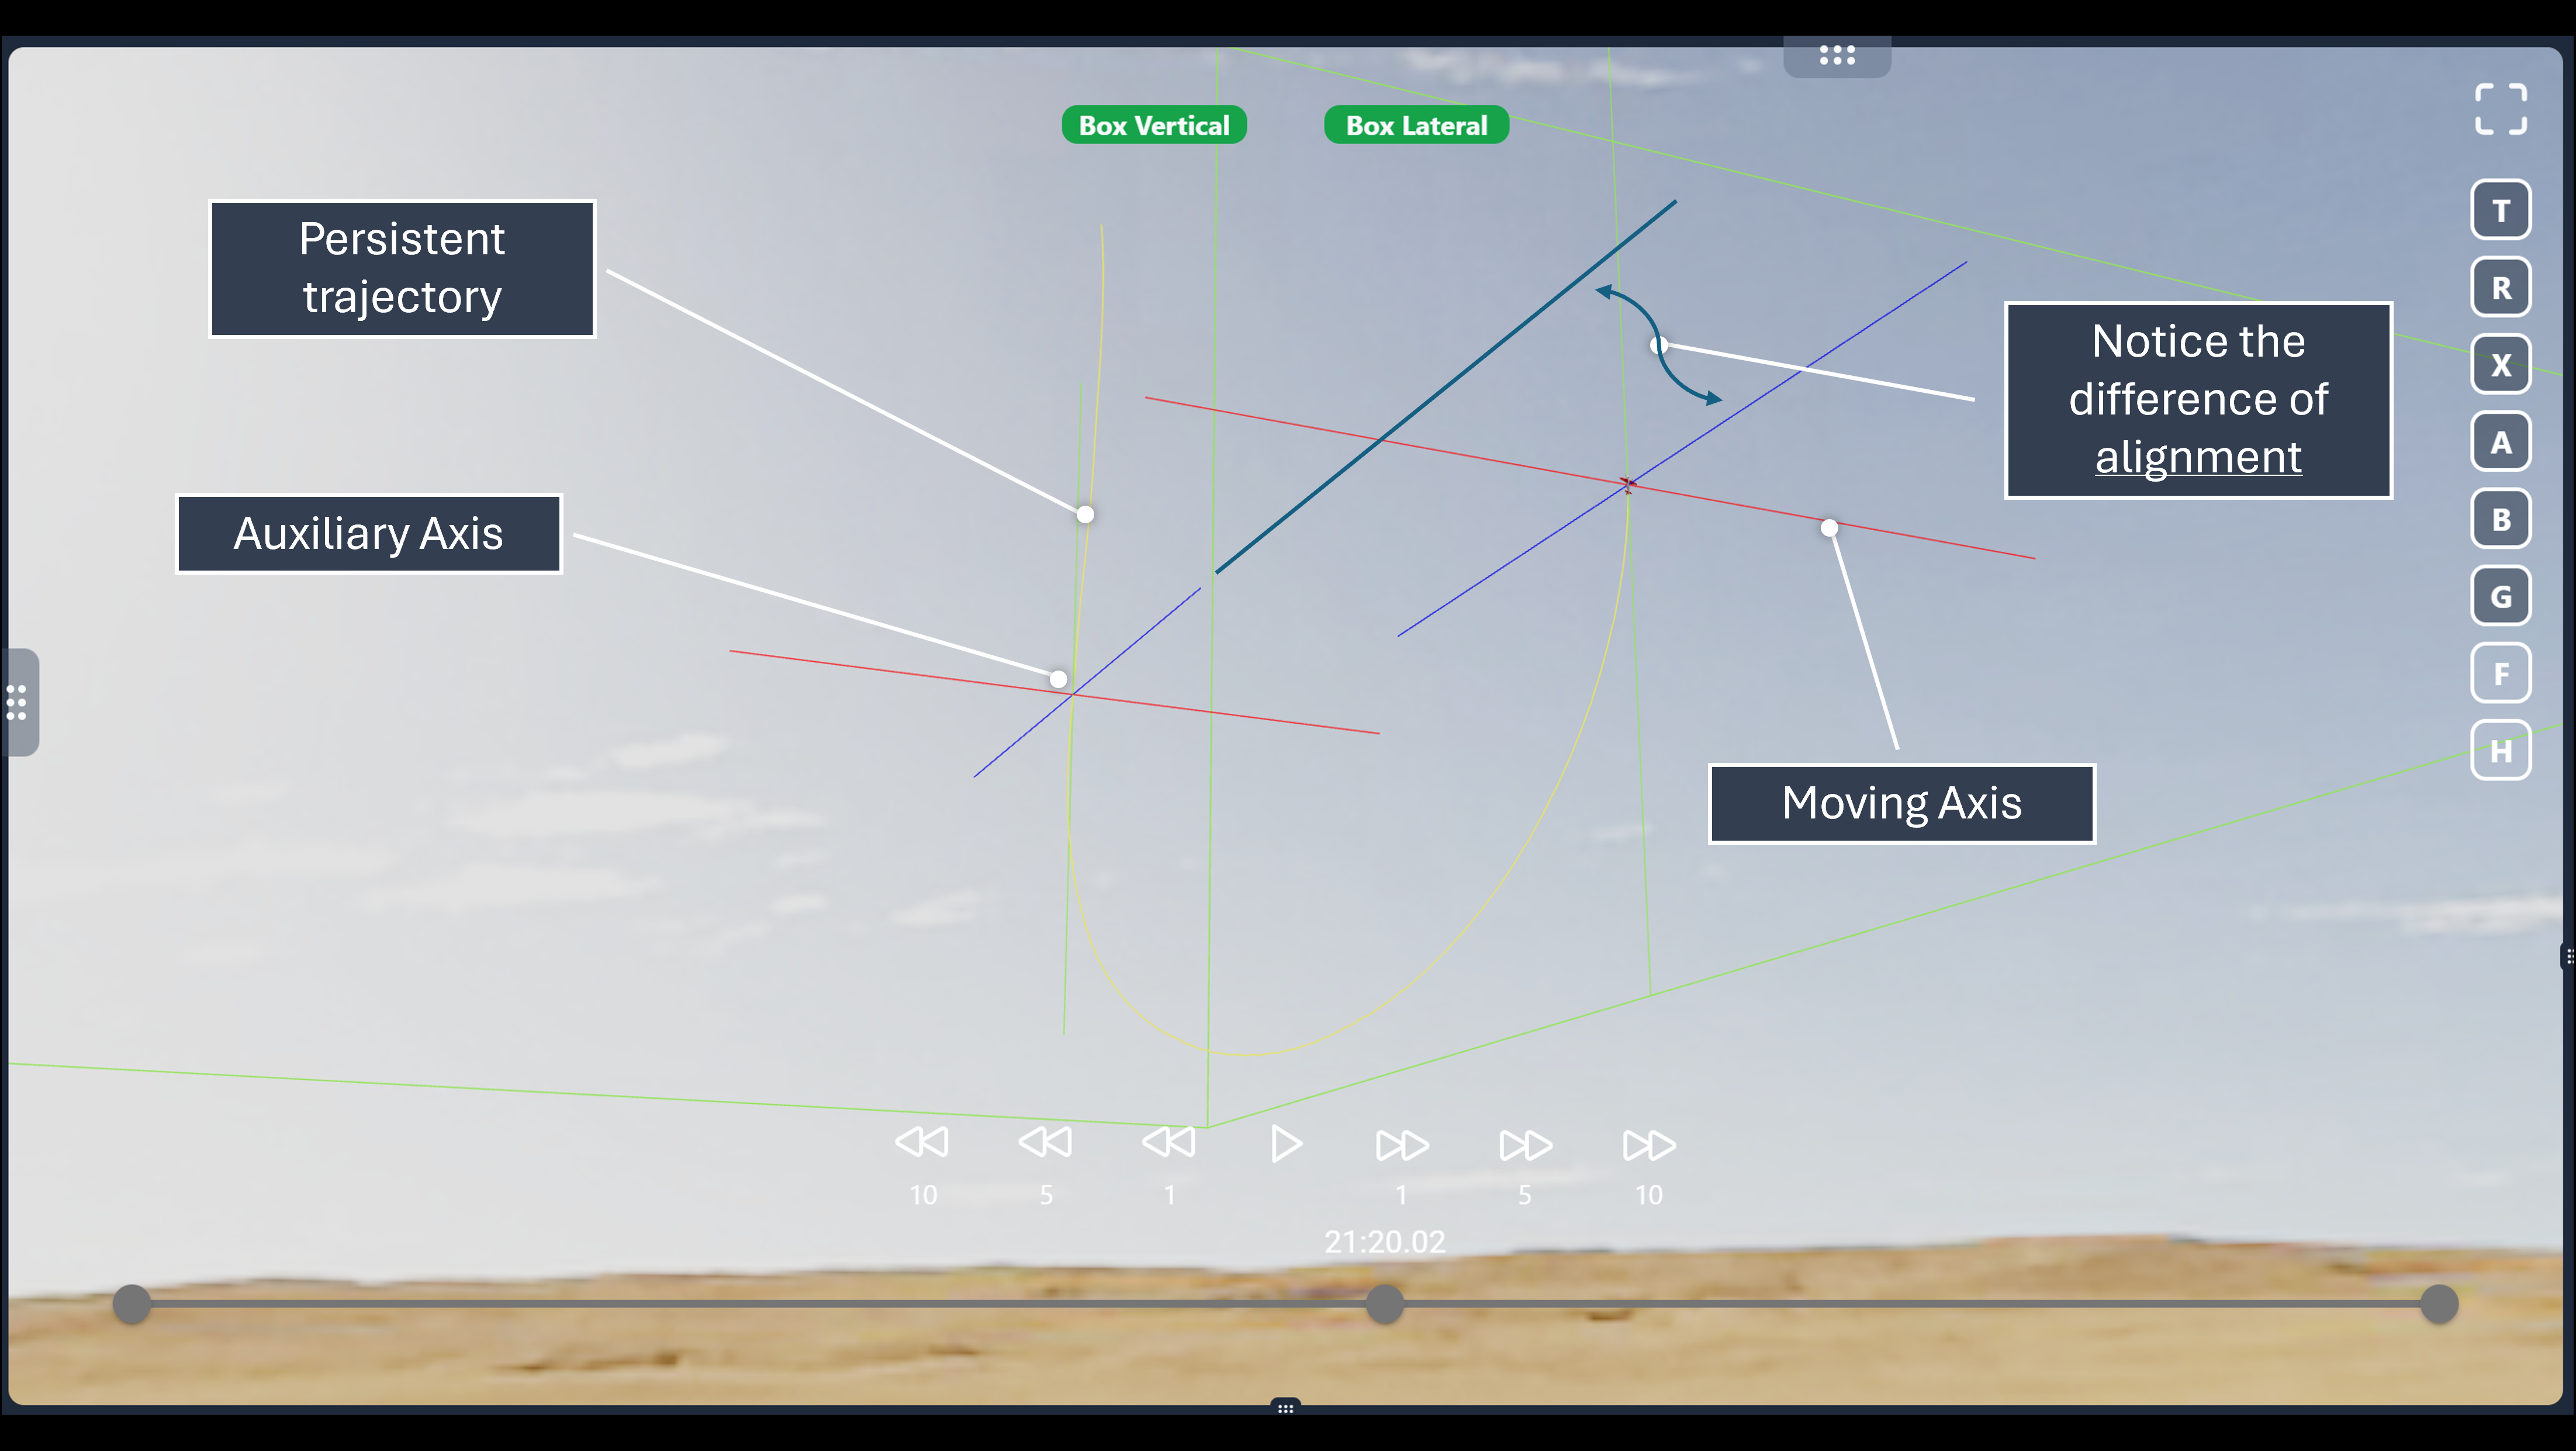
The reference axis is an orthogonal axis that always moves with the airplane, allowing the judge to precisely identify the alignment of the airplane with the aerobatic box.
- X - red line
- Y - blue line
- Z - green line
Auxiliary Reference Axis
You can drop an auxiliary reference axis using the keyboard key A. This auxiliary reference axis will remain stationary at the position it was dropped. A good example of the utility of this feature is to check if the entry and exit of an arc happened at the same height during a humpty-bumpty maneuver or similar.
This image below is an example of how the Auxiliary Axis can be used to check the alignment of an inverted humpty-bumpty. Notice that the axes are not perfectly aligned at the end of the arc. It could be due to an arc radius difference, off-heading, or wind - we’ll let you think about it.

📌 - TIP
Remember, aerobatics is all about what the judges can perceive! Be careful how you use data to analyze your flight!
Box
The aerobatic box is displayed (in green) in the Judge View. You can toggle it using the keyboard key B.
Acting like line judges, there are two flag displays to indicate the position of the airplane in relation to the box: one for lateral position and one for vertical position. The color of these flags has the following significance:
| Lateral Position | Vertical Position | |
|---|---|---|
| 🟢 | Inside | Inside |
| 🟠 | Buffer | Above |
| 🔴 | Outside | Lower |
Judge Location
Another very useful feature of ACROWRX is that you can place the judge at any location you want. This is great for aerobatic training when you can't fly over your preferred aerobatic boxes, or you want to fly higher for safety. It is also useful for airshow analysis, where you want to see what different locations of the public will perceive from your airshow routine.
The horizontal location of the judge is set by simply clicking on the map. The green dot indicates the Judge position. The map has a feature where you can display data in 3D or 2D - keyboard key F. For setting the Judge location on the map, it is better to have the data displayed in 2D over the map to avoid parallax effects.
The location of the box in relation to the judge is set in the left menu. Three controls are available:
- Judge height - height where the judge is located in relation to the ground level of the Judge position over the map.
- Judge heading - the true heading of the box Y-axis
- Judge distance - the Judge distance to the edge of the box.
📌 - TIP
The height of the box in relation to the Judge location is determined by the category selection inside the left menu of the Analysis Window.
Saving Box's Location
The last position you set for your judge and box will be the default every time you open the Analysis Window. However, if you prefer, you can also save your box and judge location using the Save Location button on the left menu.
📌 - TIP
You can manage your saved boxes in your Personal Profile page.